
 by
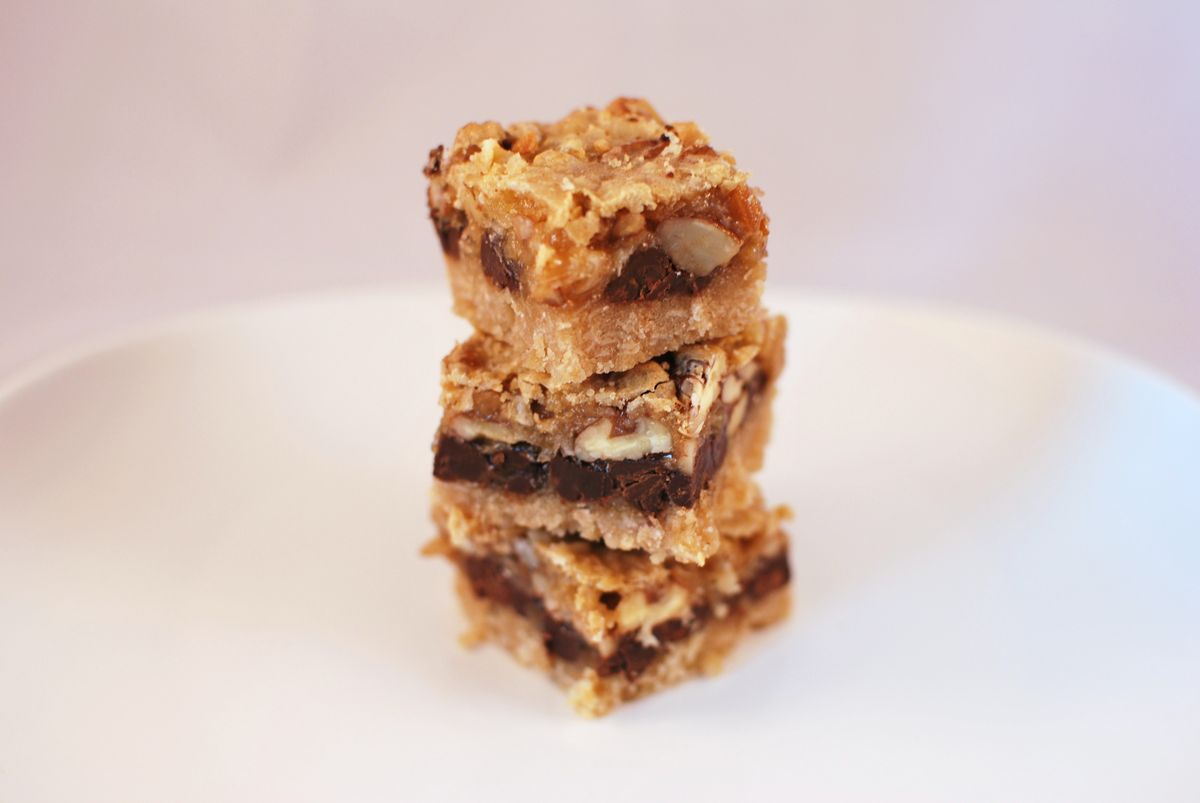
by Yesterday I posted the recipe for my first attempt at dream bars. It was extremely tasty, but not the dream bars that I was looking for. Today is my second shot. I wanted to make the crust chewier and more moist. I wanted the top to be chewy but not cookie like. So I changed things up a bit today.

The crust is perfect. The top is almost there, but not quite.
Dream Bars #2
- Crust
- 6 tbs butter – Room Temperature
- 1/4 cup brown sugar
- 1/2 cup rolled oats
- 1/2 cup flour
- pinch of salt
- 6 tbs butter – Room Temperature
- Topping
- 2 eggs
- 1 cup brown sugar
- 1 tsp vanilla
- 1 tbs flour
- 1/2 cup coconut
- 1/2 cup semi-sweet chocolate chips
- 1/2 chopped pecans
Preheat the oven to 350 degrees.
Cream together the butter and the brown sugar. When light and fluffy add the oats, flour and salt. Press the crust into a 8×8 pan. I am using a smaller pan for this as I want a nice thick bar instead of a puny little bar.

Place the crust in the preheated oven and cook for 10 minutes.
While the crust is blind baking, mix the eggs and brown sugar in a bowl. Stir in the flour and vanilla. Mix well. Then finally fold in the nuts and coconut. Don’t worry this will be a bit runny. I decided to remove some of the flour and all of the baking powder as I did not want the bars to have the consistency of a cookie. The Dream Bars from Pot Belly are moist and chewy. Hopefully this change will help.

Place the chocolate chips over the pre-baked crust. Then spread the topping mixture over the top of the pre-baked crust. Spread it out evenly. Place the pan back into the preheated oven for another 12-15 minutes. Remove when the top turns golden brown.

Let cool before cutting.

These are my closest try so far. Not quite there. The crust was perfect but the topping still needs a little work. The topping was not as chewy as I hoped. The layer of chocolate in the middle is nice, but does not follow the dream bars that I am trying to re-create. I think these tasted better than the Dream Bar I recipe, however, neither fits the bill for the pot belly dream bars. Any thoughts, let me know.

I love Potbelly dream bars and have been trying to recreate them myself. I even saved the ingredients sticker once! I will keep checking back to see if you come up with a winner. 🙂