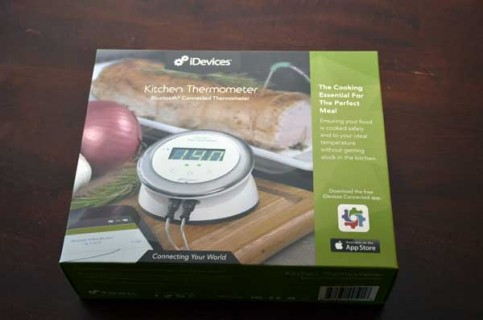
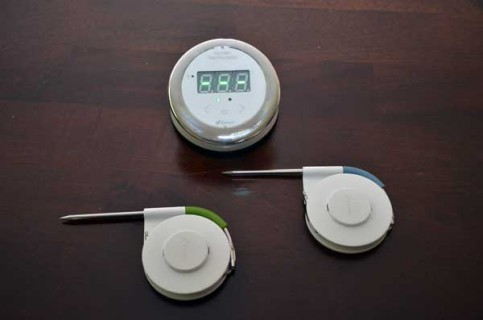
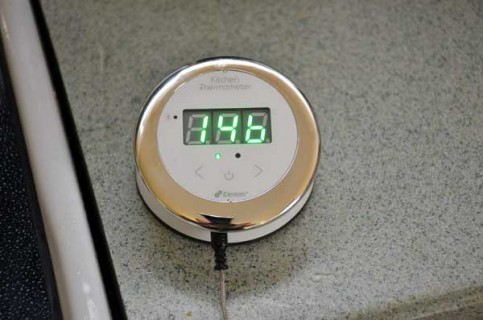
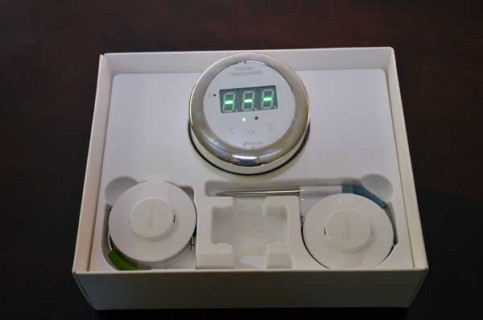
The other day the fine folks over at iDevices sent us a Kitchen Thermometer. The Kitchen Thermometer is a dual probe bluetooth thermometer that connects right to your iPhone, iPad or iPad mini. With your bluetooth connected device you can wirelessly monitor your thermometer, chart the temperature and set up alerts. This is not your mom’s kitchen thermometer. Well, unless your Mom is one connected lady. To test this device, I wanted to try it out on a large piece of meat. So, I went to the local store and found that pork tenderloins were on sale. I added a little bacon to the cart and we were all set for a great meal. The Kitchen Thermometer from iDevices was great. Check out the bottom of the post for a full review.
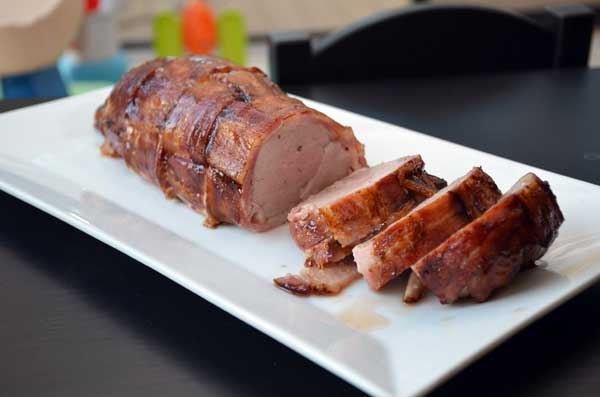
Bacon Wrapped Pork Tenderloin with Balsamic Glaze
Pre-heat the oven to 400 degrees Fahrenheit.
Season meat with salt and pepper.
On a piece of aluminum foil or parchment paper, start to make a bacon weave. To make the weave, lay out eight strips vertically on a piece of foil or plastic wrap. Then, fold over every other vertical piece of bacon in the middle then place a strip horizontally across the vertical bacon. Unfold the strips. Next fold back the alternate row of bacon that you previously left flat. Then place the next piece of bacon across the vertical strips directly adjacent to the first horizontal piece. Repeat two more times. Once you finish the first half, repeat with the other half.
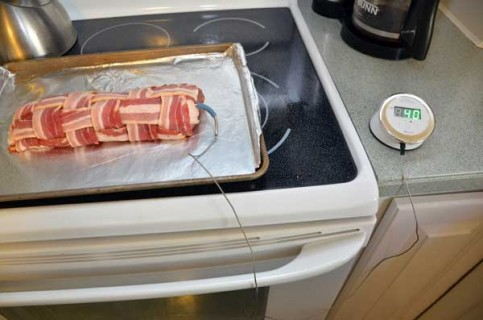
Wrap the bacon weave around meat. Place in foil-lined pan sprayed with cooking spray; sprinkle with pepper. At this time, if you have a meat probe thermometer insert it into the center of the meat. I like to stick it in the center directly from one end.
Place in the oven and cook at 400 degrees for 30-35 minutes or until the internal temperature reads 135ºF.
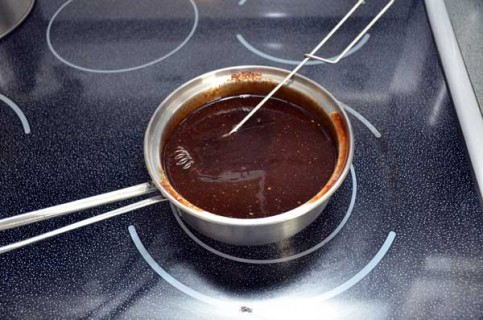
Meanwhile, Combine all the ingredients in a saucepan and stir until all the ingredients are incorporated. Simmer over medium heat until reduced by 1/3, about 15 to 20 minutes. Stir frequently.
When the internal temperature reaches 135 degrees, it is time to glaze the meat. This is where the Kitchen Thermometer shined. I could set up an alert and when the internal temperature read 135, it would alert me to tell me to put down the candy crush and glaze the meat.
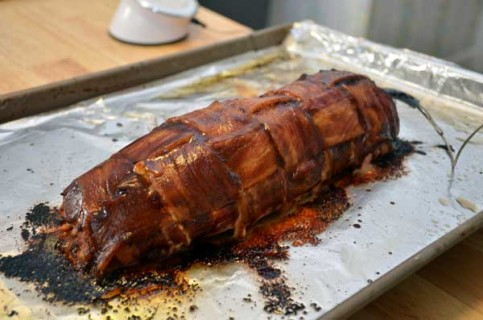
Once the meat is glazed, place it back into the oven for about 10 minutes or until done (145ºF); cover loosely with foil. Let stand 5 minutes before slicing.

- 1 Pork Tenderloin
- 1 lb thick sliced bacon
- Balsamic Glaze
- Salt and Pepper
- 1 cup 250 ml balsamic vinegar
- 3/4 cup 175 ml ketchup
- 1/3 cup 75 ml brown sugar
- 1 garlic clove minced
- 1 tbs 15 ml Worcestershire sauce
- 1 tbs 15 ml Dijon mustard
- 1/2 tsp 2 ml kosher or fine sea salt
- 1/2 tsp 2 ml freshly ground black pepper
-
Pre-heat the oven to 400 degree Fahrenheit.
-
Season meat with salt and pepper.
-
On a piece of aluminum foil or parchment paper start to make a bacon weave. To make the weave lay out eight strips vertically on a piece of foil or plastic wrap. Then fold over every other vertical piece of bacon in the middle then place a strip horizontally across the vertical bacon. Then unfold the strips. Next fold back the alternate row of bacon that you previously left flat. Then place the next piece of bacon across the vertical strips directly adjacent to the first horizontal piece. Repeat two more times. Once you finish the first half, repeat with the other half.
-
Wrap the bacon weave around meat. Place in foil-lined pan sprayed with cooking spray; sprinkle with pepper.
-
Bake the tenderloin for 30-35 minutes or until the internal temperature reads 135ºF.
-
Meanwhile, Combine all the ingredients in a saucepan and stir until all the ingredients are incorporated. Simmer over medium heat until reduced by 1/3, about 15 to 20 minutes. Stir frequently.
-
Brush meat with glaze. Bake 10 min. or until done (145ºF); cover loosely with foil. Let stand 5 min. before slicing.
-
Enjoy!
This recipe requires that you check the temperature of the tenderloin frequently. It is best to use a probe style thermometer that you can keep right in the meat. For this recipe I used the Kitchen Thermometer from iDevices.
http://store.idevicesinc.com/kitchen-thermometer-1/
Enjoy!
The Kitchen Thermometer worked great. It is sturdy, easy to use and quite pleasing to the eye. When it comes to something that sits out in your kitchen, it is more important than you would think.
The meat probes are rugged and include a handy silicon grip so that you don’t burn yourself when removing them. The software is great and allows you save temperatures by recipe or just set temps based on what ever you want. The two probes come in handy when you are cooking a big dinner. You can monitor a roast and a side to make sure they are both done to perfection. No need for multiple thermometers. The ability to step away from the kitchen without burning your food is awesome!! Even if you do not have an iPad or iPhone you can use this device with the display on the transmitter unit. The display is bright and allows you to flip between the two separate probe temperatures.
Pros: Great design, good build, easy to use right out of the box. Two probes, need I say more. The probes are rugged. In any probe thermometer the biggest design flaw is the probes. However, in this case the probes are awesome!! I even love the probe holders. Makes for easy storage. Easy to connect to an iPad or iPhone.
Cons: The device really doesn’t have any real flaws. However, I did note a few things that could be updated easily. The software while easy to use for some functions is a little hard to decipher for others. There should be a simple menu to allow you to just set the temperature quickly. The instructions in the box are simple, almost too simple. The device asks you to remove the top cover to put in the batteries, but the fit is so good you feel as if you may break it. However, if you pull hard enough the two halves separate. I asked multiple people to look at the pictures and try to install the batteries and nobody could do it. Everyone twisted it and pulled as hard as they felt safe pulling. They all commented that they felt as if they would break it, if they pulled any harder. It is ntoed that the device never broke and when pulled hard enough, eventually opened. Finally, the box came with a magnet, I still have no idea where it goes.
Overall, I love the device. While it did have a few quirks that I noted above, nothing was a deal breaker or reason to not use it. I would definitely buy one for myself and also for everyone that I know as a gift. The device has a great design, rugged build and works with everyone’s iPhone and iPad. No need for multiple devices or random remote monitors. You just use the device that you pretty much always have in your pocket.
Disclaimer – I recieved the Kitchen Thermometer free of charge. I was not compensated for my time, the review found on this blog is truthful and honest in my opinion, it is not an advertisement. I was not obligated or encouraged in any way to only provide positive reviews. Opinions found on this blog are those of the individual reviewer and do not necessarily represent the opinions of SavoryReviews.com.

